
Even on my laziest, busiest, or moodiest days, there’s one dessert I can always pull off- a no-bake cheesecake! Effortless, creamy, and comforting in every bite, today’s no bake biscoff cheesecake is just another sweet addition to my dessert book.
If you know me, you know I can’t resist a good cheesecake- and this Biscoff one? It’s got my heart! I love how the warm, caramel-spiced aroma and buttery crust come together so perfectly. Add the silky, creamy Biscoff filling, and every bite melts in your mouth with just the right balance of sweet and spice.
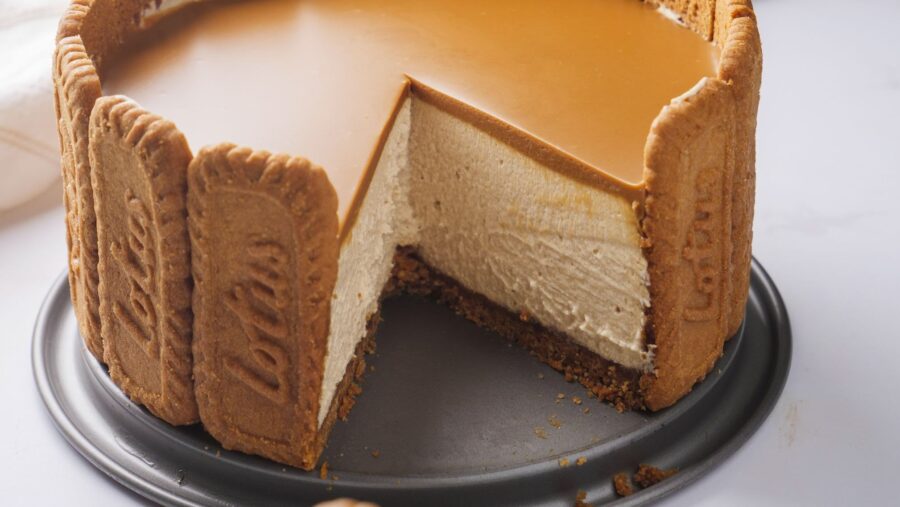
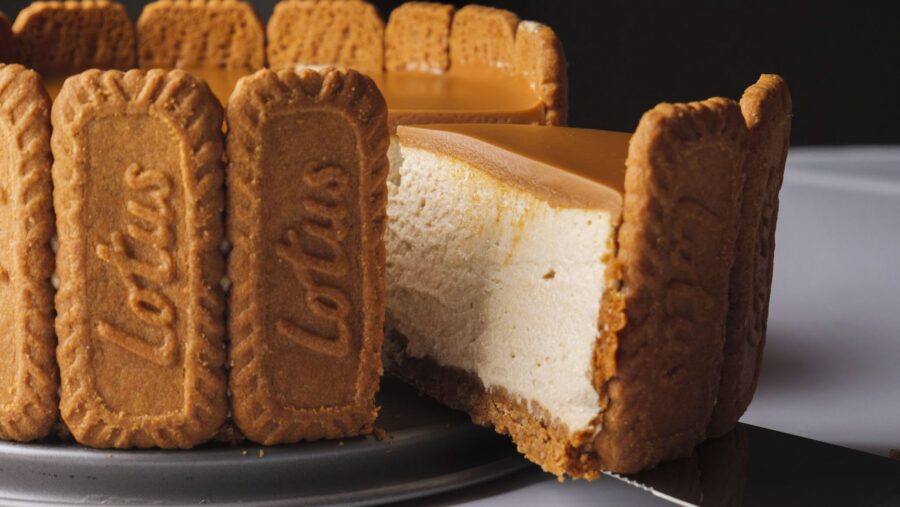
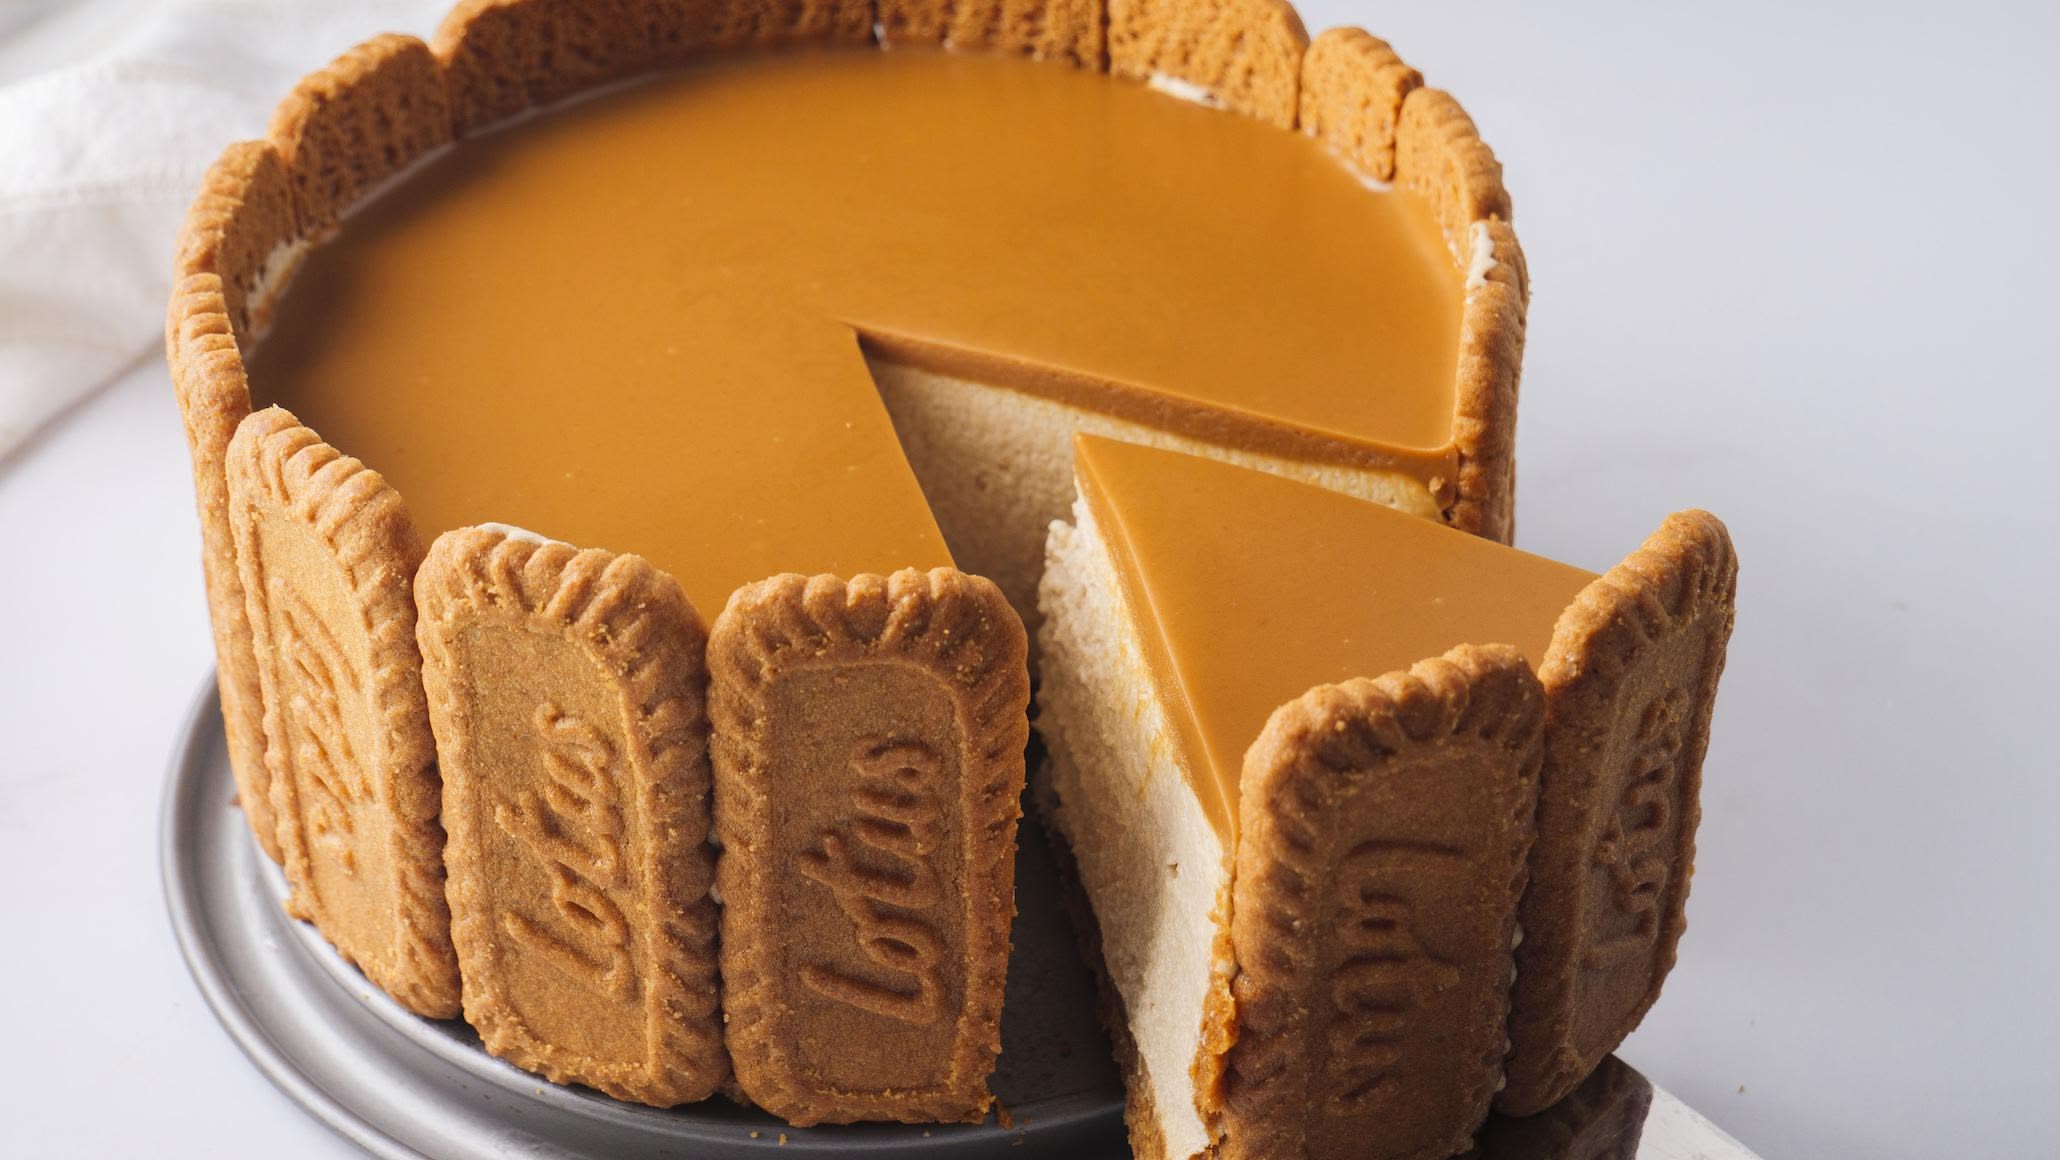
The best part? Hands down, it’s the decoration and the look! The tall Biscoff cookies form a crunchy crown, keeping the creamy center safe and adding a buttery, spiced crunch that makes every bite extra special!
Why You’ll Love This No Bake Biscoff Cheesecake
- Warm, caramel Biscoff flavor that melts in your mouth.
- Ultra creamy, soft filling that balances the crisp crust.
- Make-ahead dessert that sets beautifully overnight.
- A treat even for those who don’t like cheesecake!
- No baking required- just chill and serve.
The Trick To A Smooth, Lump-Free Filling
You know what will ruin your cheesecake filling faster than anything else? Cold cream cheese! I did that once because I was in a hurry, and the lumps were so stubborn they refused to blend no matter how much I whisked. The trick is to let the cream cheese soften just enough to press a finger into- about 10-15 minutes out of the fridge- without letting it get too runny.
Another little habit of mine is beating the cream cheese with powdered sugar and Biscoff spread first before tossing in anything else. It makes everything super smooth and silky soft.
Want an even smoother filling? Whip the heavy cream separately and fold it in gently for that airy, soft texture. Mix slowly, have patience, and scrape the bowl well- those little steps make all the difference!

Ingredient Swaps That Still Taste Amazing!
The Lotus Biscoff cookies you bought yesterday have mysteriously vanished? No worries- happens to me all the time! Here are some fun cookie and ingredient swaps that still work beautifully:
Biscoff Cookies– digestive biscuits, graham crackers, and even plain tea biscuits work as a crust or decoration.
Cream Cheese– swap part of the cream cheese with yogurt for a lighter filling, or use mascarpone if you prefer a richer, silkier texture.
Heavy Cream– whipping cream or chilled and whipped evaporated milk works fine in place of heavy cream.
Biscoff Spread– for a richer and slightly nutty twist, use peanut butter or go for Nutella if you are a chocolate lover like me!
Add Extra Yummy Stuff To Your Biscoff Cheesecake Recipe
Cheesecake is all about that perfect, creamy bite you have been dreaming of. Play with drizzles, crumbs, and toppings to make it even better than you imagined!
Melted Chocolate
Grab your favorite dark, milk, or white chocolate, microwave it for 15 seconds, and drizzle it over the cheesecake for a rich finish.
Caramel
Drizzle caramel over the cheesecake for a gooey and sweeter touch.
White Chocolate Shavings
Use a vegetable peeler to make white chocolate curls and sprinkle them over the cheesecake.
Cinnamon/Nutmeg
Add a pinch of cinnamon or nutmeg over the cheesecake for a warm and cozy flavor.
Crushed Nuts
Sprinkle crushed nuts like almonds, pecans or hazelnuts on top for extra crunch and flavor.
Fresh Fruits
Top the cheesecake with fresh fruits like strawberries, raspberries or bananas for a burst of color and nutrition.
Cookie Crumbs
Crush some extra Biscoff or digestive biscuits and sprinkle them lightly for a crunchy and tasty finish!
How To Make The Biscoff Cookie Stand Tall?
The detail that adds the wow factor to your No Bake Lotus Biscoff cheesecake? For me, it’s the tall Biscoff cookies that stand proud around the edges, framing that creamy filling inside!
My little trick is to give each cookie a tiny dab of cheesecake filling before pressing it against the pan- it actually works as edible glue. Start by placing a few cookies in the corners and then fill in the gaps between. And if a cookie still wobbles? Just pop the pan in the fridge for 15 minutes once they are in place, and you will have a cookie guard protecting your cheesecake with mouthwatering, creamy goodness!
Troubleshooting Your Biscoff Cheesecake
Ran into a problem? No worries- use this quick troubleshooting guide to rescue your cheesecake!
Too soft– didn’t chill long enough! Refrigerate the cheesecake for at least 6-8 hours or overnight.
Too Sweet– reduce the Biscoff spread and add a few drops of lemon juice or unsweetened cocoa powder.
Grainy– mix the cream cheese and sugar well separately before adding any other ingredient.
Runny– overmixed or the cream cheese was too soft. Use chilled, just-softened cream cheese and mix gently until smooth.
No Bake Biscoff Cheesecake
Ingredients
For Crust
- 14-15 Lotus Biscoff Cookies
- 4 tbsp / 60 ml Melted Butter
For Cheesecake Filling
- 1 and ⅓ cups / 320 g Cream Cheese
- ¼ cup / 30 g Powdered Sugar
- ½ cup / 118 g Biscoff Cookie Butter
- 1 cup / 237 ml Heavy Cream
- 1 tsp / 5 ml Vanilla Essence
- ½ cup / 118 g Melted Biscoff Cookie Butter
Instructions
Prepare The Crust
- Add the biscoff cookies to a food processor and pulse until fine crumbs form.
- Pour the melted butter over the crumbs and mix with a spatula until combined.
- Grab a 7-inch springform pan and line the sides with whole biscoff cookies.
- Pour the crumb mixture into the pan and use the back of a glass or spatula to press it down firmly.
- Place the pan in the refrigerator for 15 minutes to set.
Make The Cheesecake Filling
- In a large mixing bowl, add cream cheese, powdered sugar, and Biscoff cookie butter.
- Use an electric mixer to beat until smooth and creamy.
- Add heavy cream and vanilla essence to the mix and beat again until thickened.
Assemble and Chill The Cheesecake
- Take the chilled crust out of the fridge and pour the cheesecake filling over it.
- Use a spatula to smooth the top evenly and gently tap to remove any air bubbles.
- Cover and refrigerate the cheesecake overnight or at least for 6 hours.
Add Topping, Serve, and Enjoy!
- Pour the melted biscoff cookie butter over the cheesecake and spread it evenly.
- Refrigerate again for at least 30 minutes or until the topping is set.
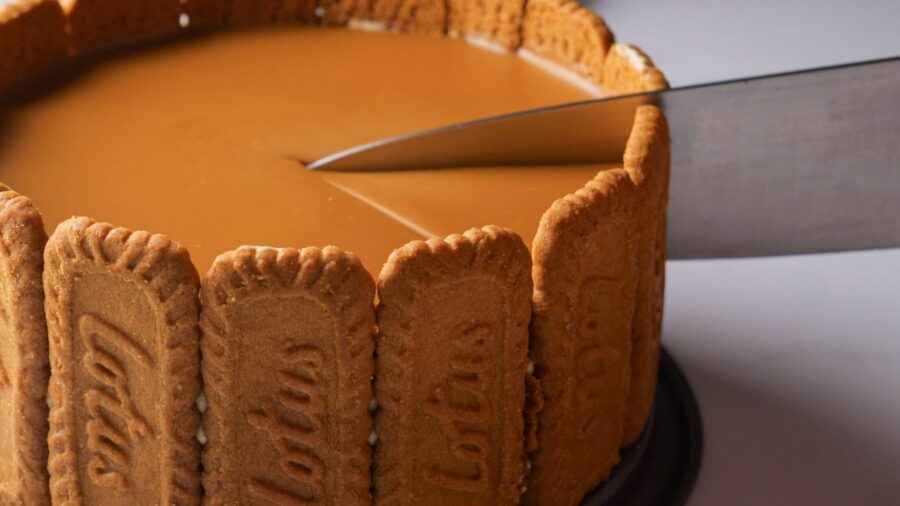
- Release the springform pan and slice into the rich, creamy layers of your easy and delicious no-bake biscoff cheesecake!
Video
This no-bake Biscoff cheesecake is actually my go-to hack for special occasions when I don’t have much time. The dessert looks so elegant and tastes wonderfully rich with that warm, caramel-spiced Biscoff flavor. Yet what I love the most? It’s effortless beauty- a simple mix, chill and assemble recipe that tastes like a dream!
Love how effortless this no-bake style is? Try my no-bake mango cheesecake, chocolate peanut butter bars, blueberry cheesecake or my personal favorite- an easy chocolate tart that’s pure happiness!
Recipe FAQs
How Long Does The Biscoff Cheesecake Stay Fresh?
This no-bake Biscoff cheesecake stays fresh for up to 3-4 days in an airtight container in the refrigerator.
Why Is My Crust Not Sticking?
Your crust may require a bit more melted butter- just press it firmly with a glass or spatula and it will hold together beautifully!
Can I Make This Biscoff Cheesecake Vegan?
Yes, you can make this recipe totally vegan-friendly by using vegan cream cheese, non-dairy cream, and vegan cookies.
What Other Spread Can I Use In Place Of Biscoff?
You can use peanut butter, Nutella, or almond butter, though the taste and texture will vary.
Can I Use Brown Sugar Instead Of Powdered Sugar?
Brown sugar is actually a bit grainy and won’t dissolve into the cheesecake as good as the powdered sugar.

Leave a Reply